Pin It
 The first time I made mochi cake, I was hunting for something that felt both comforting and a little adventurous, something that would bridge the gap between my late-night cravings and actual nutrition. A friend mentioned peanut butter and mochi in the same breath, and I became obsessed with the idea—what if that chewy, cloud-like texture met the deep, nutty richness of peanut butter? I spent an afternoon experimenting, and honestly, the moment I pulled that golden pan from the oven and heard it settle with a gentle jiggle, I knew I'd found something special.
I brought this cake to a small dinner party on a humid summer evening, and I watched people take that first bite with the kind of skepticism you reserve for foods that sound too weird to work. Then their expressions completely shifted—someone asked for the recipe before they'd even finished their first slice, and another friend sat quietly for a moment before admitting she'd never had anything quite like it. That's when I realized this cake does something special: it surprises you in the best way.
Ingredients
- Sweet rice flour (glutinous rice flour, mochiko): This is the soul of the cake, creating that signature chewy-tender texture you can't replicate with regular flour—don't skip this step or substitute regular rice flour.
- Granulated sugar: Keeps the cake moist and tender while balancing the richness of the peanut butter.
- Baking powder: Gives it just enough lift so the cake is fluffy on the inside while staying chewy.
- Salt: Even a small amount wakes up the peanut butter and adds depth.
- Whole milk and coconut milk: Together they create a creamy base that keeps the cake impossibly soft; the coconut milk adds subtle sweetness without overpowering the peanut flavor.
- Eggs: They bind everything together and add richness to every bite.
- Creamy peanut butter: Use the kind without added oils if you want a purer peanut flavor, or the conventional kind if you prefer extra smoothness—both work beautifully.
- Unsalted butter: Melted butter blends seamlessly into the batter and adds a subtle richness that elevates the whole cake.
- Vanilla extract: A small amount rounds out the flavors without announcing itself.
Tired of Takeout? 🥡
Get 10 meals you can make faster than delivery arrives. Seriously.
One email. No spam. Unsubscribe anytime.
Instructions
- Prepare your pan and heat the oven:
- Set your oven to 350°F (175°C) and get a 9x13-inch pan ready with either a light coating of butter or a sheet of parchment paper—this keeps the cake from sticking and makes serving easier. While that's heating, take a moment to gather your ingredients; having everything ready before you start mixing is a small ritual that prevents scrambling.
- Whisk the dry foundation:
- In a large bowl, combine the sweet rice flour, sugar, baking powder, and salt, whisking them together until there are no visible clumps—this distributes the leavening evenly so the cake rises gently and uniformly. This might seem like an extra step, but it ensures every square of cake has the same light, tender crumb.
- Create the wet mixture:
- In a separate bowl, whisk together the milk, coconut milk, eggs, peanut butter, melted butter, and vanilla until the peanut butter is fully incorporated and the mixture is smooth and creamy. You want no streaks of peanut butter remaining, which might take a minute or two of steady whisking—this is worth the effort because it prevents dense pockets in the finished cake.
- Bring it all together:
- Pour the wet ingredients into the dry ingredients and whisk gently but thoroughly until just combined and smooth, stopping before you overdevelop the batter—you're looking for no visible lumps of flour, but not an overly stiff batter. This is where a light hand matters; too much whisking creates a dense cake, while just enough creates that tender, almost cloud-like texture.
- Transfer and tap:
- Pour the batter into your prepared pan and give it a gentle tap on the counter a few times to release trapped air bubbles—you'll hear the batter settle and see a few bubbles break on the surface. This small step prevents large holes from forming during baking and gives you a more even crumb.
- Bake until golden and set:
- Slide the pan into the oven and bake for 45 to 50 minutes, watching for a deep golden-brown top and a clean toothpick test in the center—the cake should be set but still have a slight jiggle when you gently shake the pan. Every oven is different, so start checking at 45 minutes; if the top is browning too quickly, you can tent it loosely with foil for the last 10 minutes.
- Cool in the pan before serving:
- This is crucial: let the cake cool completely in the pan at room temperature before slicing, which usually takes about an hour—this allows the structure to set properly and makes slicing much cleaner. Cutting into a warm mochi cake results in a messy slice, but a cooled one yields neat, beautiful squares.
 Pin It
 What struck me most was how this cake brought people together without trying. It's humble enough to serve alongside morning coffee, elegant enough to finish a dinner party, and peculiar enough that it sparks conversations about food and memories and the strange magic of combining traditions from different cultures in one delicious square.
The Magic of Mochi in Cake Form
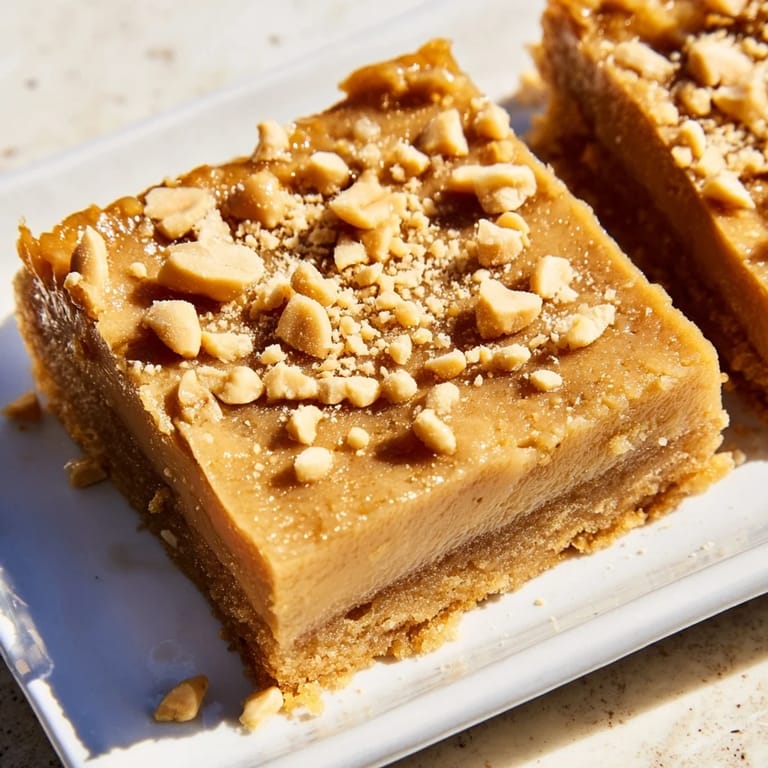
Mochi cake sits in this fascinating middle ground between cake and something else entirely—it's not quite as bouncy as traditional mochi, but it carries that same chewy, tender quality that makes every bite feel indulgent. The sweetness of the mochi pairs unexpectedly well with peanut butter, which brings earthiness and depth to what could otherwise feel one-dimensional. I've learned that this textural contrast is what makes people pause mid-bite, trying to figure out exactly what makes it different from regular cake.
Customizing Your Cake
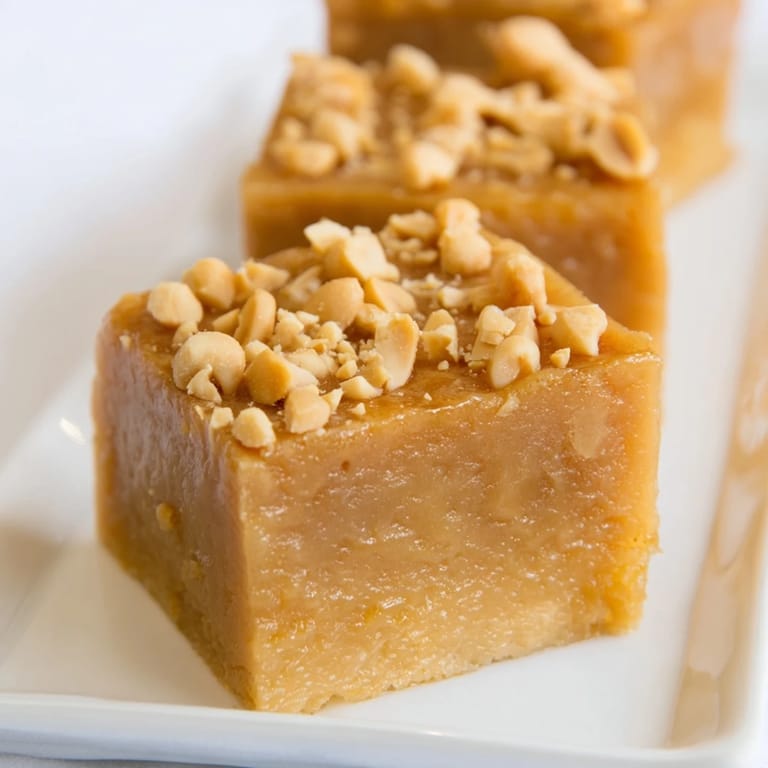
One afternoon, I sprinkled roasted peanuts across the top before baking, and the result was a subtle crunch against the chewy crumb—a small addition that changed the entire experience. You can also swap the coconut milk for evaporated milk if you want a lighter, less tropical flavor, and some people dust the finished cake with powdered sugar or serve it with a dollop of whipped cream to add richness. The base recipe is forgiving enough to play with while still maintaining that signature mochi texture.
Serving and Storage Wisdom
This cake actually improves after a day in the refrigerator, becoming even more tender and coherent—something I discovered by accident when I made it for a party and kept a square for myself overnight. Room temperature is wonderful for first-day serving, but chilled slices have a subtle, almost mousse-like quality that's equally delightful. Store leftovers in an airtight container in the refrigerator, and they'll stay soft and fresh for up to four days.
- Serve with whipped cream, fresh berries, or a simple drizzle of honey for a touch of brightness.
- This cake is naturally gluten-free, but always double-check your rice flour and peanut butter labels if you're serving someone with severe allergies.
- Leftover cake can be gently reheated in the microwave for 15 seconds for a warm, almost-fresh-baked taste.
 Pin It
 This cake has become my answer to the question, "What should I bring?" because it feels both familiar and surprising, humble and special all at once. Every time I make it, I'm reminded that some of the most memorable foods are the ones that bridge different cultures, textures, and flavors in a single, uncomplicated square.
Questions & Answers
- → What gives the cake its chewy texture?
The chewy texture comes from using sweet rice flour, also known as mochiko, which provides a distinctive, tender chew compared to regular flour.
- → Can I substitute the coconut milk?
Yes, you can replace coconut milk with evaporated milk for a lighter flavor while maintaining moisture in the cake.
- → How do I know when the cake is fully baked?
The top should be golden brown and a toothpick inserted in the center should come out clean without wet batter.
- → What are good serving suggestions?
This cake pairs wonderfully with whipped cream or fresh fruit, enhancing its nutty and creamy flavors.
- → Is this suitable for gluten-free diets?
Yes, this cake uses glutinous rice flour, which is naturally gluten-free, but check ingredients for any cross-contamination.
- → How can I add extra texture to the cake?
Sprinkling roasted peanuts on top before baking adds a pleasant nutty crunch without altering the softness inside.