 Pin It
 There's something almost meditative about the simplicity of this dish. One evening, I found myself staring into my fridge with chicken breasts and a half-empty bag of panko, wondering if I could turn something so basic into something my family would actually be excited about. Twenty minutes later, the kitchen smelled incredible—butter toasting breadcrumbs, cheese bubbling under the broiler—and I realized this humble weeknight dinner had become something I'd make again and again.
I made this for my mom on a Sunday when she wasn't feeling well, thinking comfort food might help. She took one bite and immediately asked for the recipe—I still remember her saying it tasted like the kind of thing you'd get at a nice Italian restaurant, except better because it was made with love in a regular kitchen. That's when I knew this recipe had staying power.
Ingredients
- Chicken breasts: Look for ones that are roughly the same thickness so they cook evenly; if some are thicker, give them a gentle pound with a mallet to even them out.
- Garlic powder, onion powder, and paprika: These three do the heavy lifting flavor-wise, so don't skimp or use old spices that have been sitting in your cabinet for years.
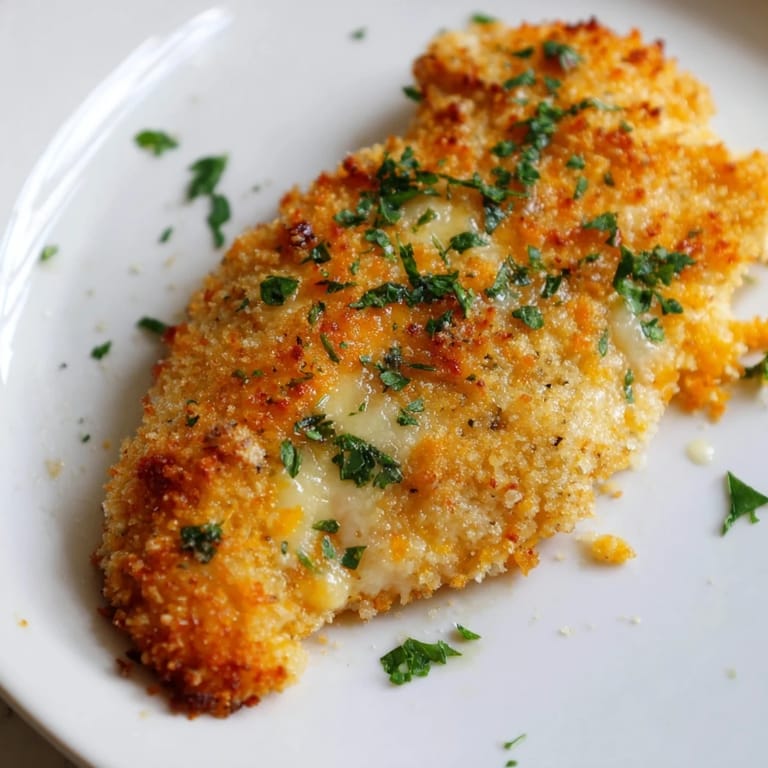
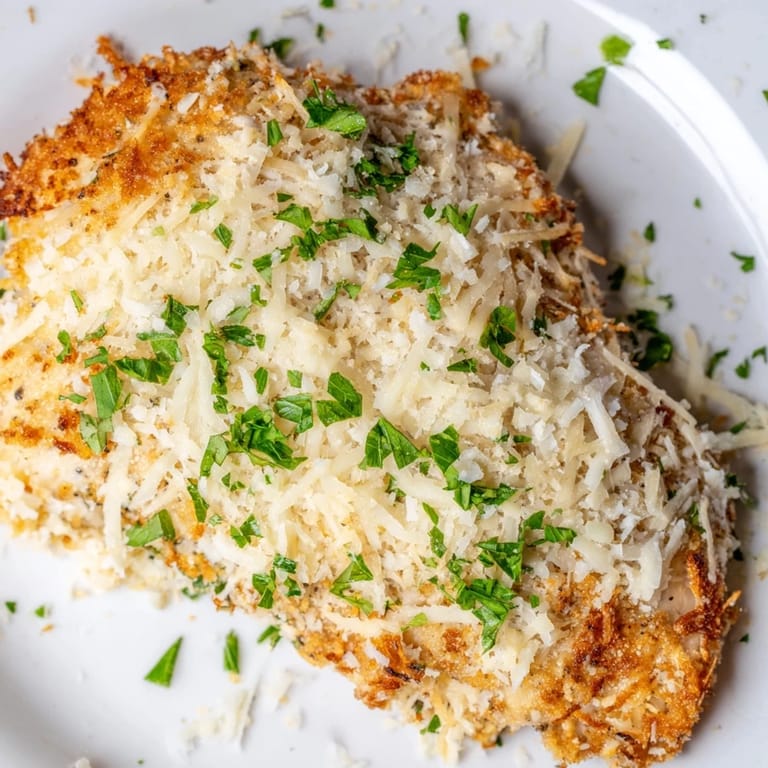
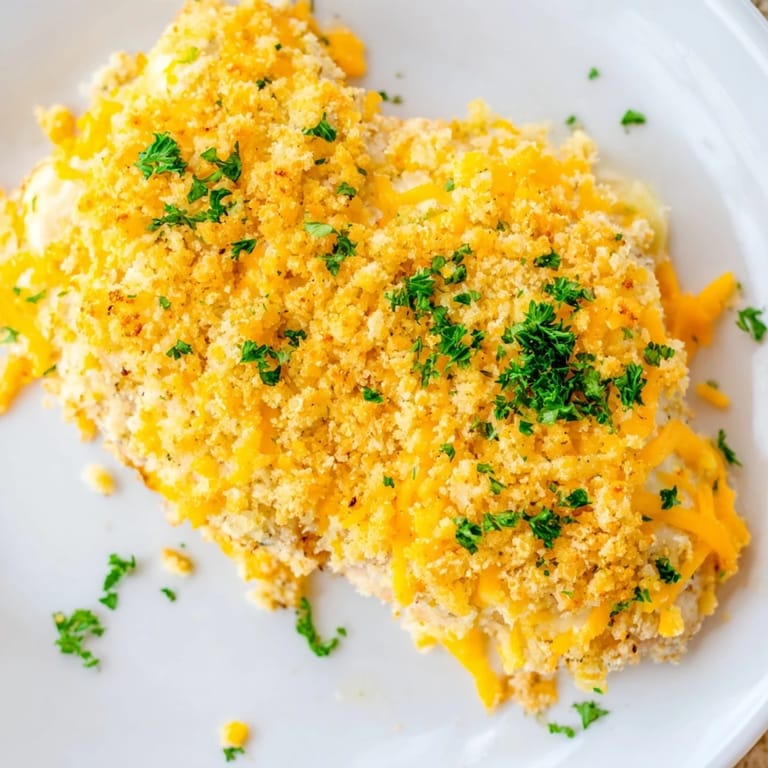
- Mozzarella and cheddar cheese blend: The mozzarella gets all melty and gooey while cheddar adds sharpness; using both together creates something neither could achieve alone.
- Panko breadcrumbs: They stay crispier longer than regular breadcrumbs, but either works if that's what you have on hand.
- Melted butter: This is what makes the breadcrumbs golden and delicious rather than just sitting there looking sad.
- Fresh parsley: A small handful at the end brightens everything up and makes it look like you actually know what you're doing in the kitchen.
Tired of Takeout? 🥡
Get 10 meals you can make faster than delivery arrives. Seriously.
One email. No spam. Unsubscribe anytime.
Instructions
- Get your station ready:
- Preheat your oven to 200°C and give your baking dish a light coating of oil; this step seems tiny but it's the difference between chicken sticking and sliding free when you serve it.
- Prepare the chicken:
- Pat your chicken breasts completely dry with paper towels—this is where people slip up, thinking the moisture doesn't matter, but it absolutely does for even cooking. Arrange them in a single layer in your dish.
- Season generously:
- Mix your garlic powder, onion powder, paprika, salt, and pepper in a small bowl, then sprinkle it evenly over both sides of each breast. Don't be shy; this is your flavor foundation.
- Layer the cheese:
- Combine your mozzarella and cheddar in another bowl and scatter it across the chicken, covering as much surface as you can. The cheese will melt into the crevices and create little pools of flavor.
- Make the crumb topping:
- Toss your breadcrumbs with melted butter until they look like wet sand, then spread them evenly over the cheese. These golden bits are going to be the first thing anyone notices.
- Bake until golden:
- Slide the dish into your preheated oven and set a timer for 22 to 25 minutes. You'll know it's done when the topping is deeply golden and the cheese is bubbling at the edges, and the internal temperature hits 74°C if you want to be precise.
- Rest before serving:
- Let it sit for 5 minutes after it comes out—I know it's hard to wait, but this time lets everything settle and makes the chicken stay juicier. Finish with a sprinkle of fresh parsley if you have it.
 Pin It
 I made this one Tuesday night when I was too tired to think about dinner, and my six-year-old actually asked for seconds—something that almost never happens. He even licked his plate, which meant I'd done something right in that moment when everything felt overwhelming.
Why This Became a Weeknight Staple
The genius of this dish is that it looks impressive without requiring any actual technical skill. You're not flipping anything, you're not managing multiple pans or watching something carefully—you just assemble and bake. My partner jokes that it's foolproof, and honestly, he might be right; I've yet to mess it up even on nights when I'm operating on zero brain cells.
Making It Your Own
Once you make this once, you'll start experimenting. I've added a layer of tomato sauce underneath the cheese for a chicken parm situation, used everything bagel seasoning instead of the basic spices, even crumbled crispy bacon into the topping once just to see what would happen—spoiler alert, it was incredible. The foundation is so solid that it welcomes improvisation.
Serving and Storage Tips
Serve this alongside something fresh to balance the richness—a crisp salad, roasted vegetables, or even just some greens with lemon vinaigrette makes the whole plate feel lighter. Leftovers reheat beautifully in a 160°C oven for about 10 minutes if you want to keep that crispiness intact, though I'm rarely left with leftovers to worry about.
- A simple arugula salad with balsamic glaze cuts right through the richness perfectly.
- If you're making this gluten-free, swap the panko for a gluten-free breadcrumb blend and nothing else changes.
- Serve immediately while the topping is still crispy, as it softens as it cools.
 Pin It
 This recipe reminds me why I love cooking: sometimes the simplest combinations, made with care, end up being the ones people remember. It's not fancy, but it's honest, and that matters more than I used to think it did.
Questions & Answers
- → What is the best way to ensure moist chicken breasts?
Patting the chicken dry before seasoning and using a moderate oven temperature helps retain moisture. Baking with a cheese and breadcrumb topping also locks in juiciness.
- → Can I substitute the breadcrumbs for a gluten-free option?
Yes, gluten-free breadcrumbs can be used to maintain the crisp texture without gluten.
- → How can I add extra flavor to this dish?
Adding a layer of tomato sauce beneath the cheese creates a Parmesan-style variation, while a pinch of chili flakes adds heat.
- → What cheeses work best for the topping?
A combination of shredded mozzarella and cheddar provides meltiness and sharpness, balancing flavor and texture effectively.
- → How long should the chicken rest after baking?
Letting the chicken rest for about 5 minutes after baking allows the juices to redistribute and the topping to set.