 Pin It
 My sister came home from a trip to Tokyo with a crinkled bag of roasted seaweed snacks, and I devoured them in one sitting. The salty crunch was addictive, and I loved how light they felt compared to potato chips. When I couldn't find them locally, I decided to make my own with nori sheets from the Asian market. It took one tray to realize how simple they were, and now I keep a stack of nori in my pantry just for emergency snack cravings.
I brought a tin of these to a movie night once, and my friends were skeptical until they tried one. By the end of the film, the tin was empty and everyone was asking for the recipe. One friend said they tasted like the ocean in the best way possible, which made me laugh because that's exactly what they are. Now it's become my go-to contribution whenever someone hosts a casual gathering.
Ingredients
- 6 sheets of dried nori (seaweed), sushi-grade: Look for nori that's dark green and hasn't been sitting on the shelf too long, as fresher sheets crisp up better and taste less fishy.
- 2 teaspoons toasted sesame oil: This is what gives the chips their nutty, toasted flavor, but you can swap in olive or avocado oil if sesame isn't your thing.
- 1/4 teaspoon fine sea salt: A light sprinkle is all you need since nori already has a natural saltiness, so start small and adjust after tasting.
Tired of Takeout? 🥡
Get 10 meals you can make faster than delivery arrives. Seriously.
One email. No spam. Unsubscribe anytime.
Instructions
- Prep Your Oven and Pan:
- Preheat your oven to 300°F and line a baking sheet with parchment paper. This low temperature keeps the seaweed from scorching while it crisps.
- Layer and Brush:
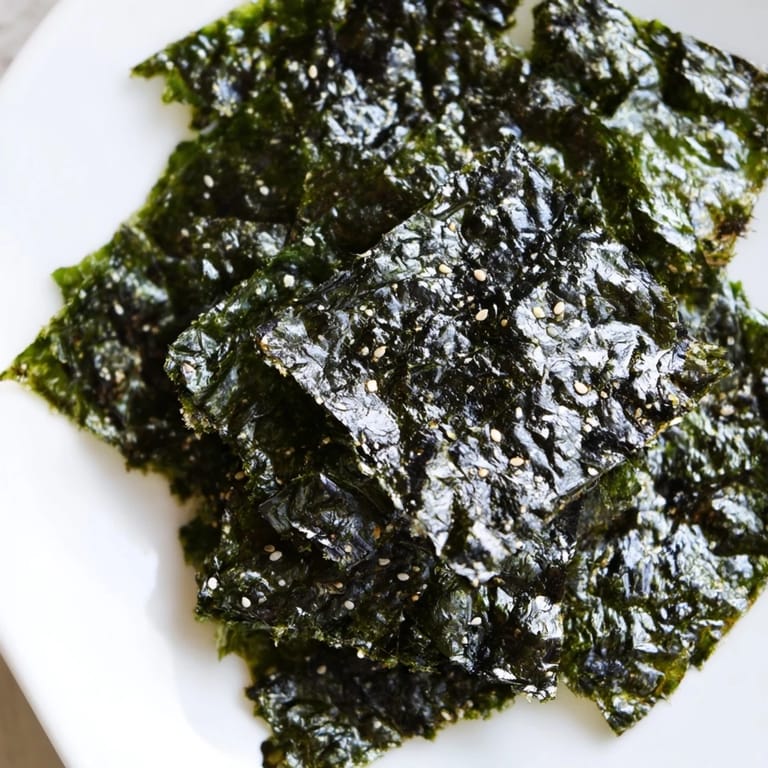
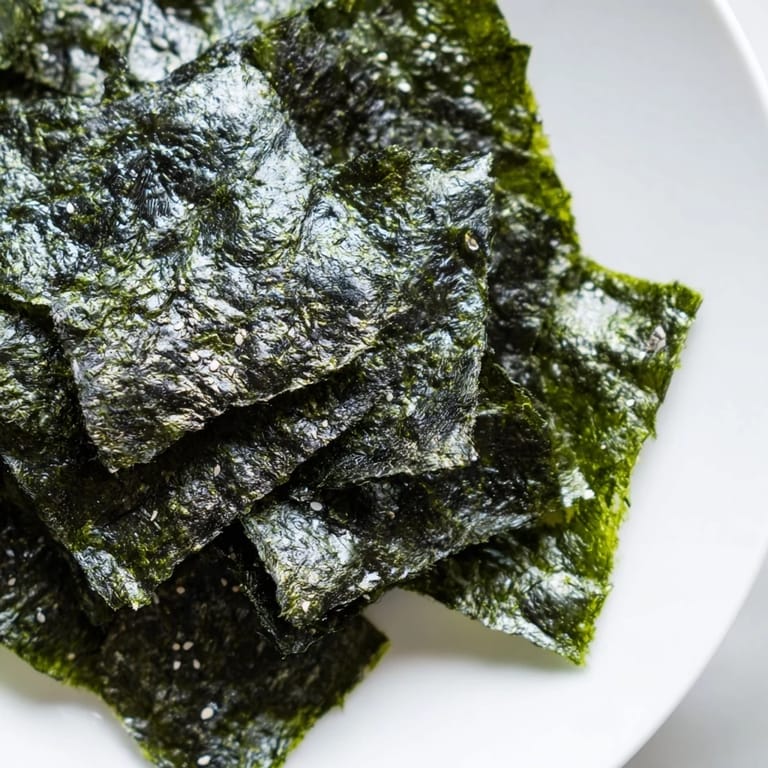
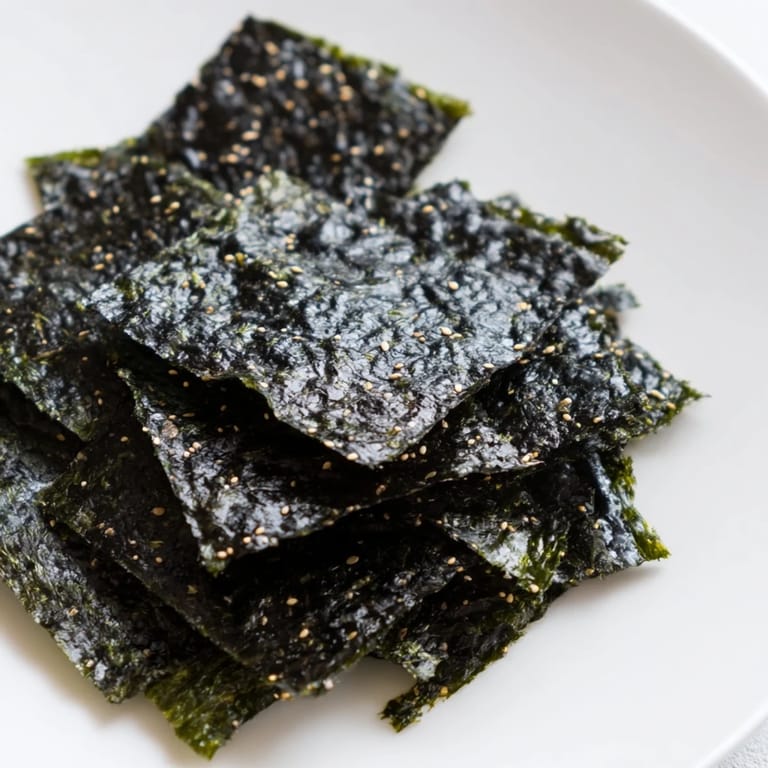
- Lay one nori sheet shiny side down, brush the top lightly with sesame oil, and sprinkle with a pinch of salt. Press another sheet on top, brush again, and repeat until you have three stacked pairs.
- Cut Into Pieces:
- Use kitchen scissors or a sharp knife to cut each pair into 2-inch strips or squares. Scissors work better because they don't tear the delicate sheets.
- Arrange and Roast:
- Spread the pieces in a single layer on your prepared sheet, making sure none overlap. Roast for 6 to 8 minutes, watching closely toward the end so they don't burn.
- Cool and Store:
- Let the chips cool completely on the pan, which is when they'll firm up and get extra crispy. Store any leftovers in an airtight container to keep them from going soft.
 Pin It
 There's something meditative about brushing oil onto paper-thin seaweed and watching it transform in the oven. My kids love helping with this recipe because they can use the scissors, and they always sneak a few chips straight off the pan. It's become one of those small rituals that makes an ordinary afternoon feel a little more special.
Flavor Twists to Try
Once you've mastered the basic version, sprinkle on a little chili flake or garlic powder before roasting for a kick. I've also tossed cooled chips with furikake seasoning, which adds sesame seeds and a hint of sweetness. A friend of mine brushes hers with soy sauce instead of oil, which makes them darker and more savory, almost like the snacks you'd buy at a konbini.
Serving Suggestions
These chips are perfect on their own, but I also love crumbling them over a bowl of rice or tossing them into a salad for texture. They pair beautifully with miso soup or as a crunchy side to sushi. Sometimes I'll set out a little dish of them next to drinks when friends come over, and they disappear faster than any cheese plate ever has.
Storage and Shelf Life
If you manage to have leftovers, keep them in an airtight container at room temperature for up to three days. Humidity is the enemy here, so if you live somewhere damp, tuck a small silica packet inside the container. If they do lose their crunch, you can refresh them in a 250°F oven for a couple of minutes.
- Always let them cool completely before sealing, or condensation will make them soggy.
- Don't refrigerate them, because the moisture in the fridge will ruin the texture.
- Make smaller batches if you're worried about waste, since they're so quick to prepare fresh.
 Pin It
 These little chips have become my favorite thing to make when I need a quick snack that feels wholesome and satisfying. They remind me that some of the best recipes are the simplest ones, and that a little crunch can go a long way.
Questions & Answers
- → Why do you layer the nori sheets?
Layering creates thicker, sturdier chips that maintain their crunch better during roasting and storage. Single sheets tend to shatter easily and lose texture quickly.
- → Can I use a different oil instead of sesame oil?
Yes, neutral oils like vegetable or olive oil work well as substitutes. Sesame oil adds authentic Asian flavor, but any light oil will prevent sticking and help with crisping.
- → How do I prevent the chips from burning?
Watch closely during roasting and check frequently after 6 minutes. Oven temperatures vary, so timing may differ. Chips should darken to a rich green without turning black or smelling burnt.
- → What flavor variations can I try?
Before roasting, add chili flakes for heat, garlic powder for savory depth, or furikake seasoning for Japanese-style complexity. Experiment with different seasonings to customize your chips.
- → How should I store leftover chips?
Keep finished chips in an airtight container at room temperature. This preserves crispiness and prevents moisture absorption. Properly stored chips stay fresh for several days.
- → Are these chips suitable for dietary restrictions?
Yes, these chips are naturally vegan, gluten-free, and low-carb. However, verify that your nori is certified gluten-free if you have celiac disease, and check for sesame allergies.