 Pin It
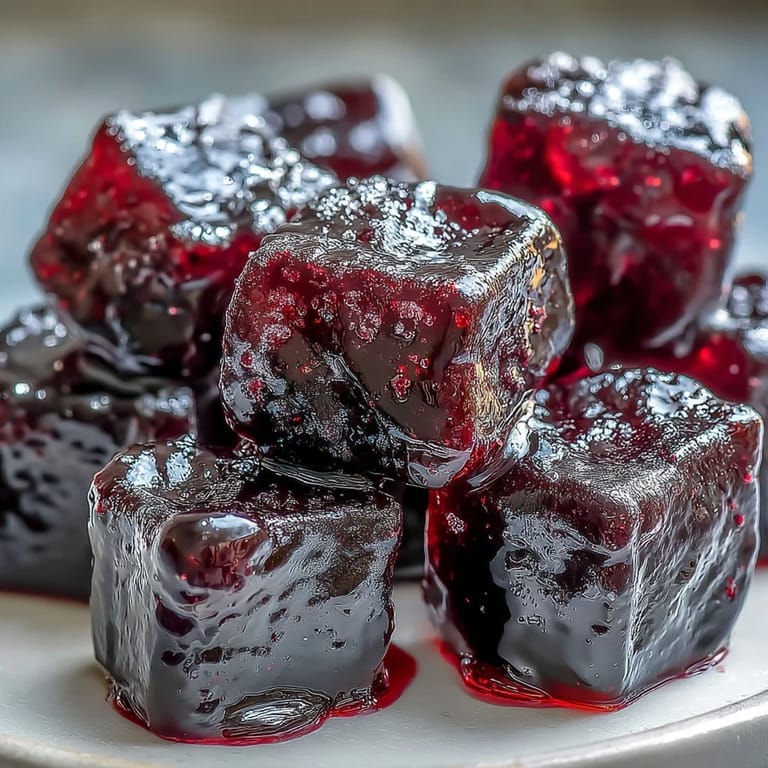
 My kitchen smelled like a farmer's market when I first attempted these black currant gummies on a lazy Sunday afternoon. A friend had brought over a container of these glossy, jewel-like candies from a specialty shop, and I was immediately hooked by their tart-sweet flavor and chewy texture. That evening, I wondered if I could recreate them at home, and after a bit of experimenting with ratios and timing, these little bursts of fruity joy became a regular fixture in my candy jar. Now, whenever I simmer black currants down, that distinctive deep purple aroma instantly transports me back to that first successful batch.
I'll never forget bringing a batch to my book club, tucked into a vintage glass jar with a handwritten label. Everyone expected some fancy store-bought treat, and the moment they popped one in their mouth, the room went quiet in that special way that only happens when people taste something genuinely delicious. One friend asked for the recipe right then and there, and now she makes them for her kids' lunch boxes.
Ingredients
- Fresh or Frozen Black Currants (1 cup / 150 g): These tart berries are the soul of these gummies, packed with deep flavor that sweetens beautifully when reduced, and frozen ones work just as well as fresh if you can't find them locally.
- Water (1/3 cup / 80 ml for the base): Just enough to help the berries release their juice and pulp without diluting the flavor.
- Lemon Juice (2 tablespoons): This brightens the deep currant flavor and prevents the gummies from tasting one-dimensionally sweet.
- Granulated Sugar (3/4 cup / 150 g): Balances the tartness and gives the gummies their signature glossy appearance and slight crystalline bite.
- Unflavored Powdered Gelatin (3 tablespoons / 30 g): The magic ingredient that transforms juice into those satisfying chewy bites, and powdered gelatin dissolves more smoothly than sheets.
- Cold Water (1/3 cup / 80 ml for blooming): Always use cold water when blooming gelatin—warm water starts melting it prematurely and ruins the texture.
- Granulated Sugar for Coating (1/4 cup / 30 g, optional): A light dusting makes them look jeweled and adds a subtle crunch against the chew.
Tired of Takeout? 🥡
Get 10 meals you can make faster than delivery arrives. Seriously.
One email. No spam. Unsubscribe anytime.
Instructions
- Simmer the Black Currants:
- Pour your black currants and water into a saucepan and let them bubble away gently over medium heat for about 5 to 7 minutes. You'll know they're ready when the berries soften and start to split open, releasing their deep purple juice into the pan.
- Strain and Pulp:
- Set a fine mesh strainer over a clean bowl and pour the hot mixture through, using the back of a spoon to gently press the berries and extract every bit of juice and pulp while leaving the skins and seeds behind. You should end up with about 2/3 cup of silky puree that's the color of amethyst.
- Sweeten the Base:
- Stir the lemon juice and sugar into your warm puree, stirring until the sugar completely dissolves and the mixture tastes balanced between tart and sweet. This is when you can taste and adjust if needed—add a pinch more lemon if it feels cloying, or a touch more sugar if the tartness is too sharp.
- Bloom the Gelatin:
- Sprinkle your powdered gelatin over the cold water in a small bowl and let it sit untouched for 5 minutes, absorbing the liquid and becoming spongy. This blooming step is crucial because it ensures the gelatin dissolves evenly without lumps.
- Meld the Mixture:
- Return your currant puree to the saucepan over low heat and add the bloomed gelatin, stirring constantly and gently until it's completely dissolved and the mixture is smooth and glossy. Never let it boil—high heat damages the gelatin's setting power.
- Mold or Pan:
- Carefully pour your mixture into silicone candy molds or a parchment-lined 8x8-inch pan, tapping the surface gently a few times to release trapped air bubbles that would create holes in your finished gummies. Work slowly here because the mixture cools quickly and thickens as it sits.
- Chill Until Set:
- Refrigerate for at least 2 hours, though overnight in the fridge makes them firmer and more satisfying to bite. You can tell they're ready when they jiggle slightly but don't stick to your finger when you press them.
- Release and Finish:
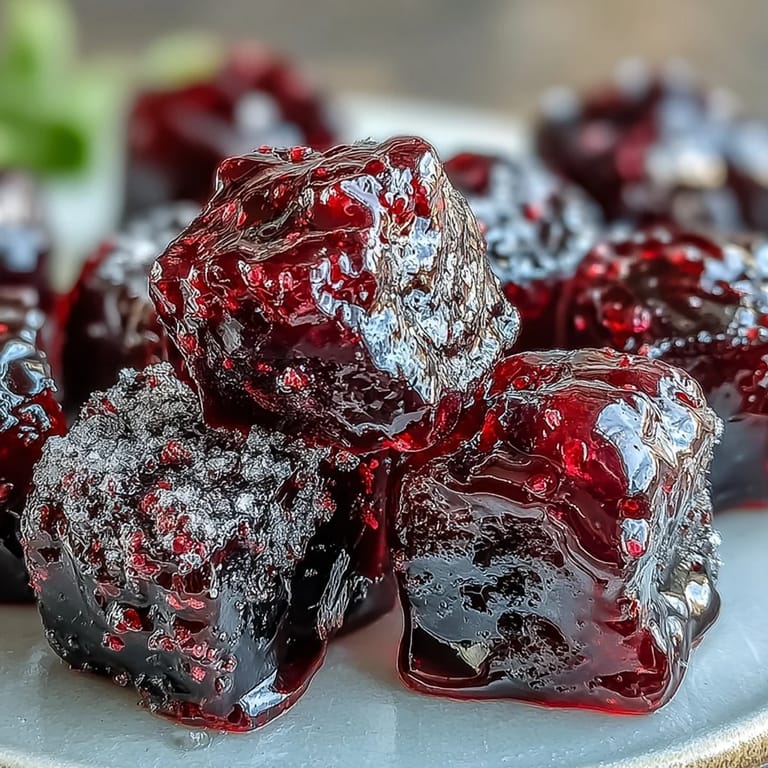
- Pop the gummies from silicone molds or carefully cut the pan into bite-sized squares using an oiled knife or kitchen shears. If you're coating them in sugar, toss them gently in a shallow bowl while they're still slightly chilled so the sugar adheres nicely.
 Pin It
 There's something almost meditative about watching those dark purple berries collapse into silk during that first simmer, knowing you're about to turn them into something people will actually get excited about eating. These gummies proved to me that homemade candy doesn't need to be intimidating or time-consuming—just thoughtful and made with ingredients you actually recognize.
Storage and Shelf Life
These gummies live happily in an airtight container in the fridge for up to two weeks, though I've never had a batch last that long. If you're ambitious and want to extend their life, you can store them in the freezer for a couple of months, though they'll be slightly firmer and take about 10 minutes to come to room temperature.
Flavor Variations to Explore
Black currants are wonderful on their own, but once you master this recipe, you'll start thinking about other berries and fruits calling out for the gummy treatment. Raspberries make a brighter, slightly more delicate gummy, while blueberries create something earthier and deeper, and you can even blend currants with other berries to invent entirely new flavor combinations.
Making These Special
The beauty of homemade gummies is that you can customize them in ways commercial candies never will. You could infuse your base with a touch of cardamom or a hint of rose water, or experiment with different sugars like muscovado for a more complex sweetness, and nobody needs to know if your first attempt is a little softer or firmer than expected because it's still delicious and absolutely homemade.
- For a vegan version, replace gelatin with 1.5 tablespoons of agar-agar powder, though you may need to adjust simmering time as agar sets differently.
- A light coating of sanding sugar or regular granulated sugar makes them look even more enticing in a gift jar.
- Keep them in the coldest part of your fridge if your kitchen runs warm, as they can soften faster in humid environments.
 Pin It
 Making candy at home transforms something store-bought and ordinary into an experience, a gift, a small act of care you can do on a quiet afternoon. These black currant gummies prove that sometimes the most memorable treats are the simplest ones, made with patience and just enough attention to detail.
Questions & Answers
- → Can I make these gummies vegan?
Yes, substitute gelatin with agar-agar powder. Use 1.5 tablespoons agar powder instead of gelatin, though the setting method and ratios may vary slightly. Heat the agar mixture longer to ensure proper activation.
- → How long do homemade gummies last?
When stored in an airtight container in the refrigerator, these gummies will stay fresh for up to two weeks. They may become slightly firmer over time but remain safe to eat.
- → Can I use other fruits besides black currants?
Absolutely. Raspberries, blueberries, strawberries, or blackberries work well. Adjust sugar levels based on fruit tartness. The method remains the same regardless of berry choice.
- → Why did my gelatin not dissolve properly?
Gelatin needs to be bloomed in cold water first, then added to warm liquid. Avoid boiling as this can break down the gelatin structure. Stir continuously over low heat until completely dissolved.
- → Do I need special equipment to make gummies?
Not necessarily. Silicone candy molds are convenient but not required. A parchment-lined square pan works perfectly—simply pour the mixture, refrigerate until set, then cut into squares or shapes.