 Pin It
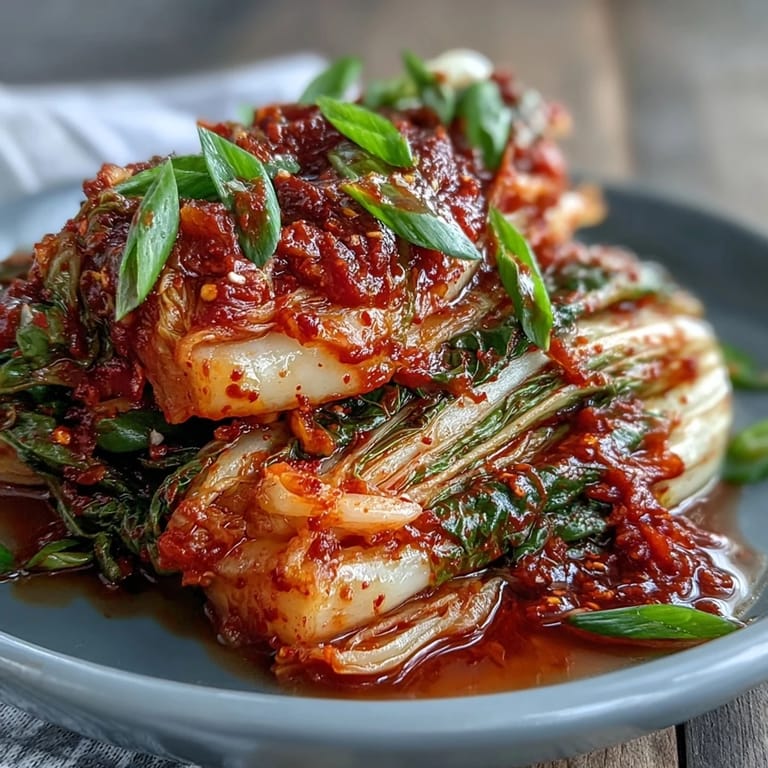
 My first batch of kimchi sat fermenting on my kitchen counter for three days while I obsessively checked it like a nervous parent, convinced I'd somehow messed up this ancient Korean staple. The smell that emerged—garlicky, funky, alive—was nothing like the mild jar from the grocery store, and that's when I understood why people made this at home. Now, whenever I see that familiar red paste coating fresh cabbage, I'm transported back to that moment of uncertainty turning into pure joy with that first tangy bite.
I made this for a potluck last fall, and it became the thing people actually fought over, leaving the fancy salads untouched. One friend who swore she didn't like kimchi ate it straight from the jar while standing at my counter, and I realized this recipe had converted someone who didn't even know they were missing out. That's when I knew I'd found something worth perfecting.
Ingredients
- Napa cabbage (1 large head, about 1.2 kg): This is your blank canvas—look for one that feels heavy and dense, with pale green outer leaves that signal freshness.
- Daikon radish (1 medium, julienned): The crunch stays even after fermentation, and it picks up spice beautifully, so don't skip it.
- Scallions (4, sliced): They add a gentle onion note that mellows slightly as fermentation happens, bringing balance to the heat.
- Carrot (1 medium, optional but I always add): A touch of natural sweetness keeps the kimchi from becoming one-note and adds visual warmth.
- Coarse sea salt (80 g): This draws moisture from the cabbage and creates the brine—don't use table salt, the minerals matter here.
- Cold water (1.5 liters for brining): Keep it cold so the cabbage stays crisp while the salt does its softening work.
- Garlic (6 cloves, minced): Raw garlic will mellow and meld into the background as fermentation progresses, so you can be generous.
- Fresh ginger (thumb-sized piece): This brings warmth and a subtle spice that intensifies over time, grounding the heat of the chilies.
- Small onion (roughly chopped): It disappears into the paste but adds depth and a slight sweetness that rounds everything out.
- Fish sauce (3 tbsp) or soy sauce for vegan: This is the umami bomb—don't skip it even though it smells intense, the fermentation tames it into savory gold.
- Sugar (1 tbsp): Just enough to feed the fermentation and balance the salt, not enough to taste sweet.
- Korean red chili flakes, gochugaru (3–5 tbsp): Start at 3 and taste as you blend—this is where your spice preference lives, and you can always add more.
- Rice flour (2 tbsp): This creates a protective paste coating and feeds the fermentation process, making it essential for texture.
- Water for paste (150 ml): Keep this separate and make sure it's at room temperature when you blend so your paste stays smooth.
Tired of Takeout? 🥡
Get 10 meals you can make faster than delivery arrives. Seriously.
One email. No spam. Unsubscribe anytime.
Instructions
- Prep the cabbage with intention:
- Cut your cabbage lengthwise into quarters, then chop into rough 2-inch pieces—this size ferments evenly and stays tender without falling apart. Work with the cabbage, not against it; you'll feel where it naturally wants to break.
- Salt and soften:
- Dissolve your sea salt into cold water and submerge the cabbage completely, using a plate weighted down to keep everything underwater. Toss every 30 minutes for two hours; you'll feel the cabbage getting progressively softer and more willing to bend.
- Rinse away the excess:
- Drain and rinse the cabbage 2–3 times under cold running water, letting your fingers work through the layers to release the salt. The goal is to remove the brine but keep some salt behind—taste a piece, it should be pleasantly salty, not aggressively so.
- Make the paste foundation:
- Whisk rice flour with water in a small saucepan over medium heat, stirring constantly until it thickens into a glossy coating (about 1–2 minutes). Let it cool completely; warm paste will cook your vegetables and mess with the fermentation.
- Blend your flavor base:
- Combine the cooled paste with garlic, ginger, onion, fish or soy sauce, and sugar in a blender, processing until completely smooth. This should smell intensely pungent and garlicky—that's exactly right.
- Add the heat and adjust:
- Stir in gochugaru to your preferred spice level, starting at 3 tablespoons and building from there. Taste a tiny bit on your finger; you want it assertive but not so hot that you can't enjoy the other flavors.
- Massage and coat:
- Combine your drained vegetables in a large bowl and pour the spice paste over them, then pull on kitchen gloves and massage everything together like you're working dough. Every piece should be coated deep red, and your hands will be warm and tingly—that's the capsaicin saying hello.
- Pack tight and leave headspace:
- Transfer everything into clean glass jars, pressing down hard to eliminate air pockets and ensure vegetables stay submerged under their own liquid. Leave at least 1 inch of headspace at the top because fermentation gases will push upward.
- Ferment with patience:
- Leave jars at room temperature, away from direct sunlight, and burp them daily by loosening the lid to release built-up gas. You'll hear little fizzes and see bubbles climbing the sides after a day—that's the living culture doing its work.
- Taste and transition:
- After 48 hours, open a jar and taste—if it's sour and tangy enough for you, move it to the fridge where fermentation slows dramatically. It'll keep developing flavor for weeks, becoming deeper and more complex the longer it sits.
 Pin It
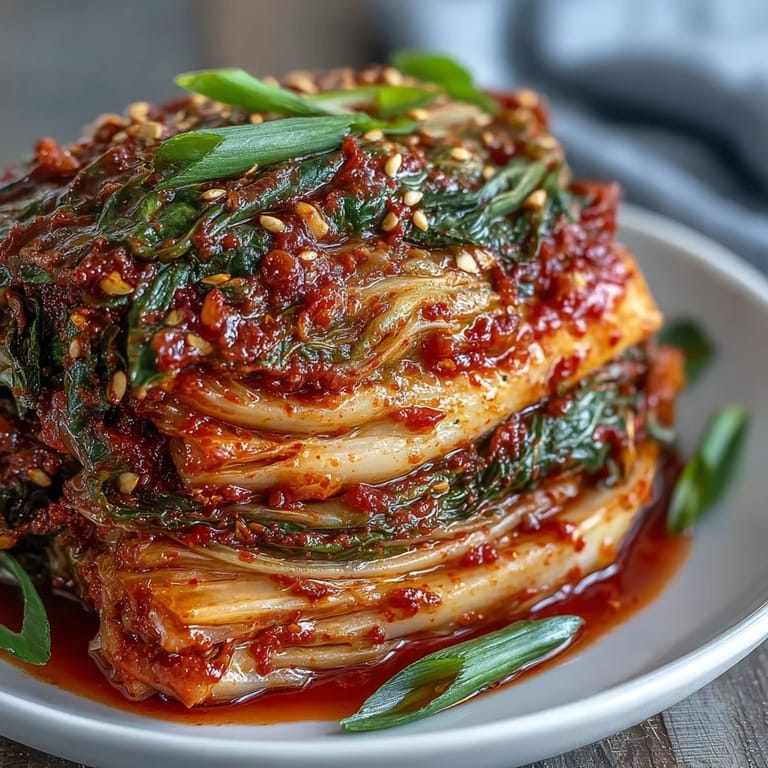
 I gave a jar to my elderly Korean neighbor once, expecting polite appreciation, but she came back days later with tears in her eyes saying it reminded her of her grandmother's kitchen. That moment taught me that food made with attention carries something beyond flavor—it carries intention and respect for where it comes from. Every jar I make now holds that memory.
The Science of Fermentation
What's actually happening in those jars is a wild party of lactobacillus bacteria fermenting the sugars in your vegetables and creating lactic acid, which preserves everything while building flavor complexity you can't rush. The rice flour paste provides starch that feeds this beneficial bacteria, and the salt creates an environment where only the good microbes thrive while harmful ones can't survive. Understanding this transforms kimchi from a mysterious recipe into a fascinating biological process you're actively hosting.
Customizing Your Heat Level
If you love spice, gochugaru is your playground—I've gone up to 6 tablespoons in batches for friends who think most kimchi is timid. If you're heat-sensitive, grated pear or apple added to the paste brings sweetness that balances spice without requiring you to reduce the chili flakes. The beauty of making your own is that you control every element, so experiment until you find your exact sweet spot; it usually takes two batches to dial it in perfectly.
Storing and Serving Your Kimchi
Once your kimchi moves to the fridge, it'll keep for months as long as you use clean utensils and keep the vegetables submerged in their brine. I eat mine on rice with a fried egg, mixed into soups right before serving, chopped into stews, or straight from the jar when I need a flavor jolt. The fermentation liquid becomes liquid gold for dressings and marinades, so never pour it down the drain.
- Serve cold straight from the jar for maximum crunch, or let it come to room temperature for a softer, more mellowed flavor.
- If your kimchi gets too sour over time, it's not spoiled—it's just very mature, and it's perfect for cooking into soups or braised dishes where that intensity adds complexity.
- Gift jars to friends who appreciate fermented foods; homemade kimchi from your own kitchen has a way of making people feel genuinely cared for.
 Pin It
 Making kimchi taught me that good food isn't about fancy equipment or complicated techniques—it's about respecting ingredients and giving them time to become themselves. Every batch teaches you something new about your kitchen's temperature, your taste preferences, or the patience fermentation actually requires.
Questions & Answers
- → How long does kimchi fermentation take?
Allow kimchi to ferment at room temperature for 1–2 days, then transfer to the refrigerator. The flavor continues developing over several weeks, becoming more tangy and complex.
- → What makes kimchi spicy?
Korean red chili flakes called gochugaru provide the signature heat. Adjust the amount from 3–5 tablespoons depending on your preferred spice level.
- → Can I make kimchi vegan?
Simply substitute fish sauce with soy sauce or vegan fish sauce alternative. All other ingredients including the vegetables, gochugaru, and seasonings remain plant-based.
- → Why rinse the salted cabbage?
Rinsing removes excess salt after the initial salting process, preventing the final product from being overly salty while still maintaining proper fermentation conditions.
- → What's the purpose of rice flour in the paste?
Rice flour creates a thickened base that helps the spice paste adhere to the cabbage leaves, ensuring even coating and consistent flavor throughout.